Are you ready to automate your web browser tasks with Selenium? One of the first steps you’ll need to take is to download ChromeDriver. If you’re working with Selenium, ChromeDriver is the essential link between your scripts and the Chrome browser. Whether you’re using it for web testing, scraping, or automation, setting it up correctly is crucial.
In this guide, we’ll walk you through downloading ChromeDriver on Windows, Mac, and Linux, and we’ll also provide tips for troubleshooting common issues.
Contents
- 1 What Is ChromeDriver?
- 2 Why You Need to Download ChromeDriver
- 3 Prerequisites Before You Download ChromeDriver
- 4 How to Find Your Chrome Version
- 5 How to Download ChromeDriver on Windows
- 6 How to Download ChromeDriver on Mac
- 7 How to Download ChromeDriver on Linux
- 8 Troubleshooting Common ChromeDriver Issues
- 9 Conclusion
What Is ChromeDriver?

Before we get into the technical steps, let’s understand what ChromeDriver is and why you need it. ChromeDriver is a standalone server that implements the WebDriver wire protocol for Chromium browsers (like Google Chrome). In simple terms, it allows you to control the Chrome browser programmatically through tools like Selenium. Without it, your Selenium scripts can’t communicate with Chrome, rendering them useless for browser automation.
For tasks like:
-
Automated testing: Simulate user interactions for testing websites.
-
Web scraping: Extract information from websites automatically.
-
Robotic process automation (RPA): Automate repetitive tasks on the web.
ChromeDriver acts as a bridge to translate Selenium commands into actions that Chrome can understand and execute.
Why You Need to Download ChromeDriver
When you run automated tests or scripts with Selenium, your code communicates with Chrome via the ChromeDriver. It’s a bit like a translator, ensuring that your instructions are carried out correctly. Each browser version has its own driver, so it’s critical to match the version of ChromeDriver to your Chrome browser version.
Here’s why downloading ChromeDriver correctly is essential:
-
Selenium Compatibility: Without ChromeDriver, your Selenium scripts won’t be able to launch or interact with the Chrome browser.
-
Correct Versioning: Mismatched versions can lead to errors and malfunctioning scripts. By downloading ChromeDriver based on your Chrome browser’s version, you ensure everything runs smoothly.
-
Optimized Performance: A properly installed and configured ChromeDriver ensures faster and more reliable automation.
Prerequisites Before You Download ChromeDriver
Before starting the download process, ensure you have the following:
-
Google Chrome installed: You’ll need Chrome to run your tests.
-
Command-line access: Whether it’s Command Prompt (Windows), Terminal (Mac), or the Linux shell, you’ll need basic command-line access to install and verify ChromeDriver.
-
Python installed (if using Selenium with Python): If you’re using Python for scripting, make sure it’s installed, along with the
pippackage manager. -
Selenium installed: To use ChromeDriver, you’ll need Selenium. Install it via the following command:
How to Find Your Chrome Version
To download the right version of ChromeDriver, you’ll need to know the version of your Chrome browser. Here’s how to find it:
On Windows & Mac:
-
Open Google Chrome.
-
Click the three vertical dots in the top right corner to open the menu.
-
Navigate to Help > About Google Chrome.
-
You’ll see your version number (e.g., 95.0.4638.69).
On Linux:
You can use the terminal command:
The version number will be shown in the format “95.0.4638.69”, where “95” is the version you need to match with ChromeDriver.
How to Download ChromeDriver on Windows
Follow these simple steps to download and install ChromeDriver on your Windows machine:
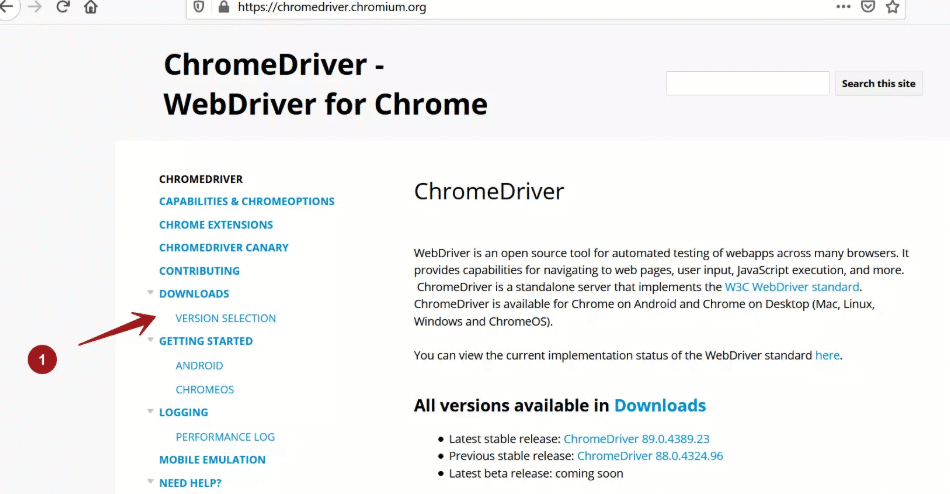
Step 1: Visit the Official ChromeDriver Website
-
Go to the official ChromeDriver download page.
-
Locate the version of ChromeDriver that matches your Chrome browser version.
Step 2: Choose the Correct Version
Click on the version number that corresponds to your Chrome browser. If you’re unsure, you can check your browser’s version as explained earlier.
Step 3: Download the Windows ZIP File
-
Click the chromedriver_win32.zip file to download.
-
Once the download completes, extract the ZIP file using WinRAR or Windows’ built-in extractor.
Step 4: Place ChromeDriver in a Folder
Move the extracted chromedriver.exe file to a convenient folder. A commonly used location is:
Step 5: Add ChromeDriver to System Path
-
Right-click This PC (or My Computer) and click Properties.
-
Select Advanced system settings, then click Environment Variables.
-
Under the System variables section, locate and select the Path variable, then click Edit.
-
Add the folder path where your
chromedriver.exeis located (e.g.,C:\WebDrivers\). -
Click OK to save.
Step 6: Test ChromeDriver Installation
Open Command Prompt and type:
If everything is set up correctly, the ChromeDriver version will display.
How to Download ChromeDriver on Mac
Follow these steps to download and set up ChromeDriver on a Mac:
Step 1: Open Terminal
Use Spotlight or search for Terminal in the Applications folder.
Step 2: Find Your Chrome Version
In Terminal, type:
Step 3: Visit the ChromeDriver Website
-
Go to the ChromeDriver download page.
-
Select the version of ChromeDriver that matches your Chrome version.
Step 4: Download the Mac ZIP File
Click the chromedriver_mac64.zip link to download it.
Step 5: Unzip and Move ChromeDriver
-
Unzip the downloaded file.
-
Move
chromedriverto/usr/local/bin/using the following command:
Step 6: Make ChromeDriver Executable
Give the appropriate permissions to chromedriver:
Step 7: Verify Installation
Test the installation by typing:
How to Download ChromeDriver on Linux
To download ChromeDriver on Linux, follow these steps:
Step 1: Open Terminal
Launch your terminal application.
Step 2: Check Your Chrome Version
Use this command to get your Chrome version:
Step 3: Download the Correct ChromeDriver Version
Visit the ChromeDriver download page, and download the correct version for your browser.
Alternatively, use wget to download directly:
Step 4: Unzip and Move ChromeDriver
Extract the downloaded ZIP file:
Move the chromedriver file to /usr/local/bin/:
Step 5: Make ChromeDriver Executable
Change the permissions:
Step 6: Test Installation
Test it by typing:
Troubleshooting Common ChromeDriver Issues
While downloading ChromeDriver is relatively straightforward, users sometimes face issues. Here are some common problems and how to fix them:
1. Version Mismatch Error
This is the most common error. Ensure the version of ChromeDriver matches your installed Chrome version.
2. chromedriver: command not found
If this happens, ensure ChromeDriver is in your system PATH. Double-check the installation path and try again.
3. Permission Denied (Linux/Mac)
On Linux or Mac, ensure ChromeDriver has the proper permissions:
Conclusion
Downloading and setting up ChromeDriver might seem like a small task, but it’s an essential part of automating your web testing or scraping process with Selenium. Following the steps outlined above will help you install ChromeDriver on Windows, Mac, and Linux without any hassle.